Hello internet! It’s time for another blog update for my game character side project…the Wanderer Redux!
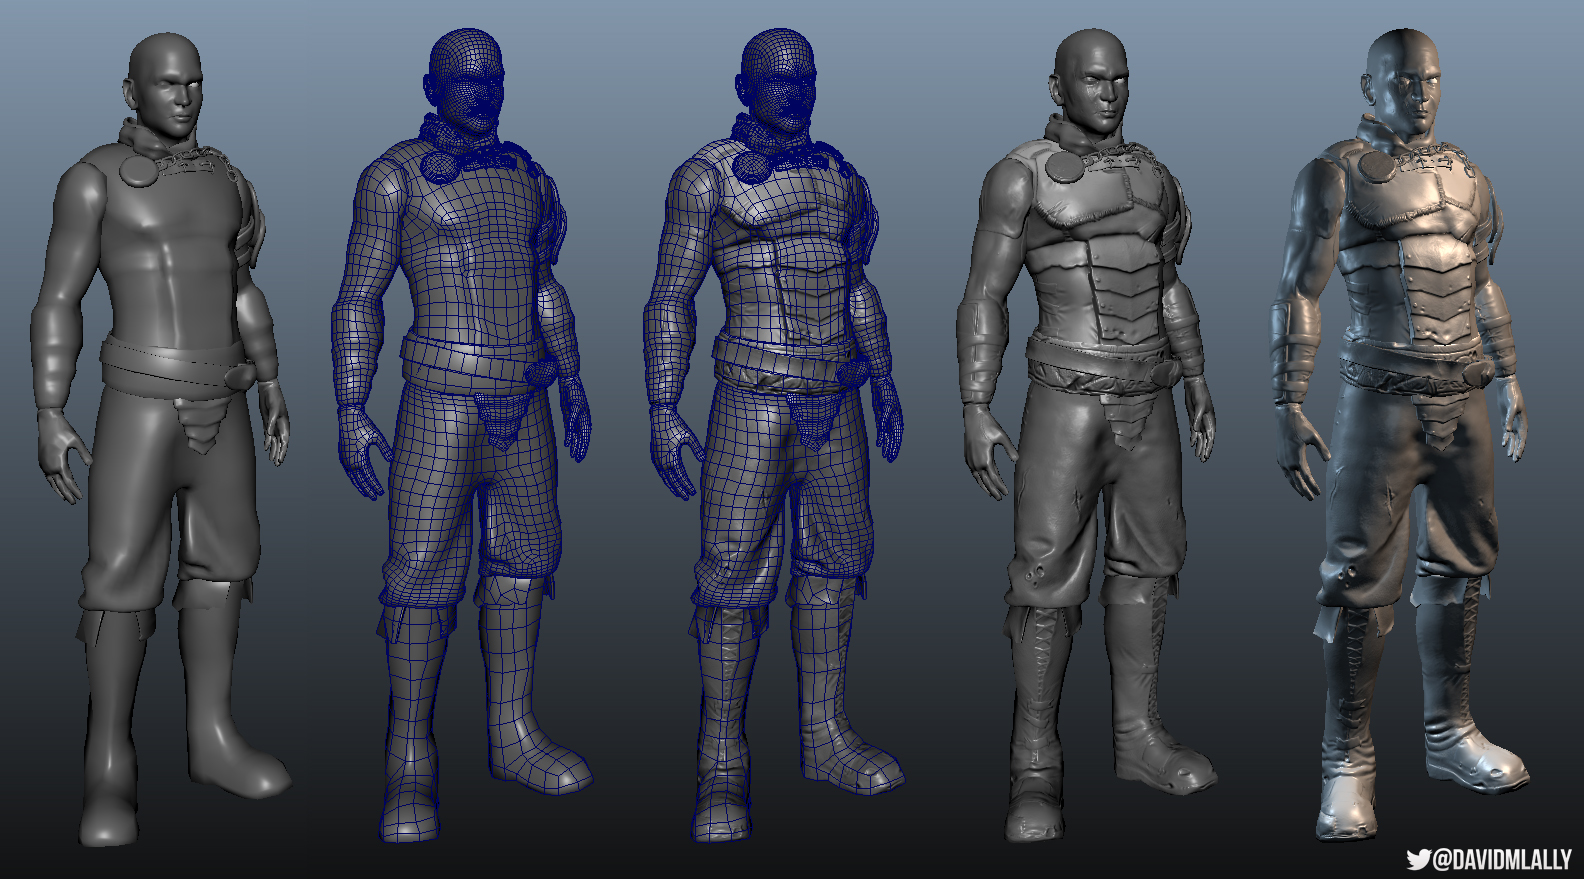
I’ve been slugging away at the low resolution retopology of the Wanderer character recently, using both Topogun and ZBrush’s ZRemesher feature. I’ve been baking normal maps like a crazy person for each of these body parts and accessories as well. Some are sharing UV space to save on texture memory, and all of them will be reduced in resolution once I begin to port things over to an actual game engine. For now, all of these images were grabbed using Maya’s Viewport 2.0. After generating the low-poly mesh, I added a quick IK rig so I could get him out of that dreadful T-Pose and into something a bit more relaxed. Check it out:

The low resolution pose of the Wanderer character with most of his baked normal maps applied. Maya Viewport 2.0.
I always knew that at this point in the project, I would be revisiting the cloth patterns that I had previously setup using Marvelous Designer. My patterns still worked, but I wanted the cloth pose for the final turntable to be a bit more dynamic, so I decided to run some simulations. First, I needed to update my collision body to be a simplified version of my new character pose. With ZRemesher and Dynamesh, this was a breeze. I also used this technique for some of the character’s retopology early on. The idea is simple:
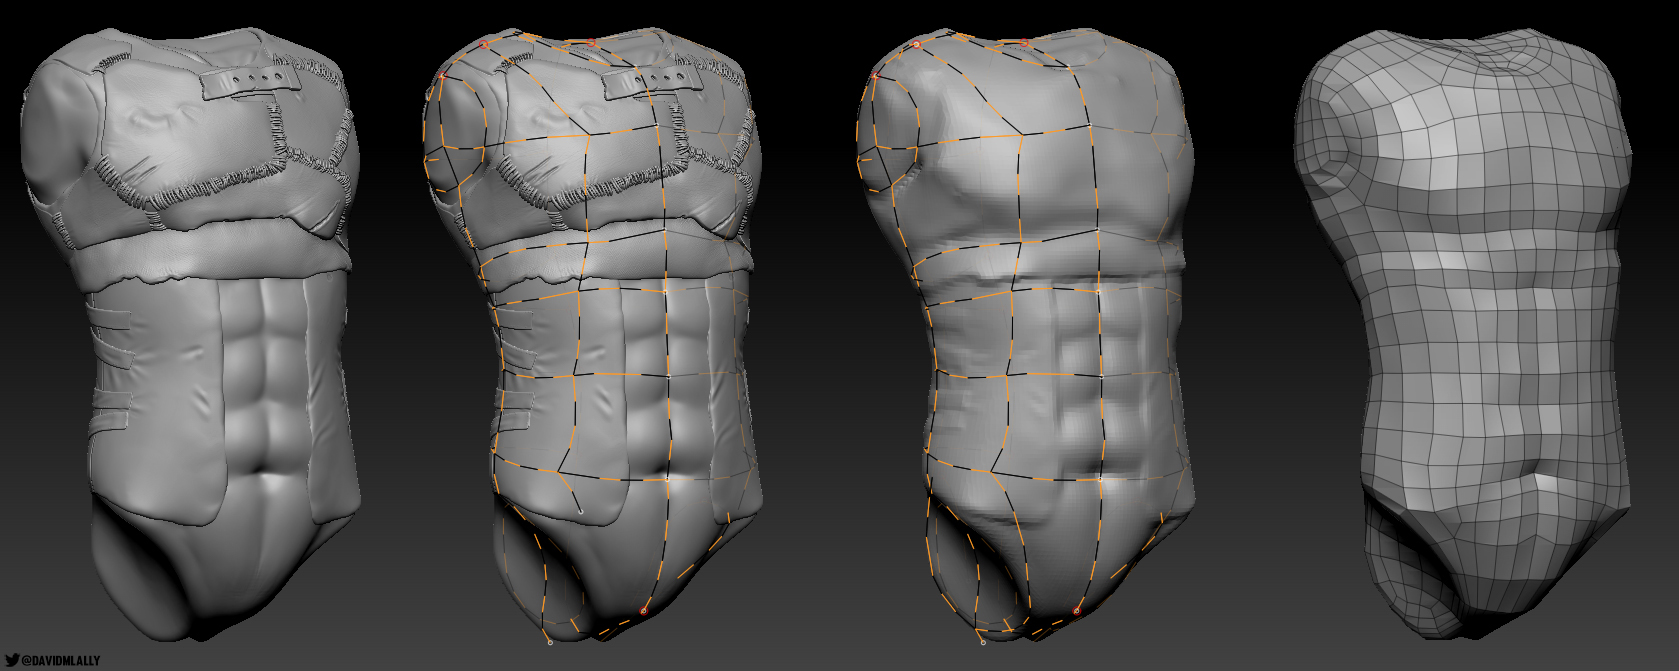
Using Dynamesh and ZRemesh Guides to retopologize a high resolution object into a low resolution object.
Take your high resolution mesh into ZBrush as a single, combined piece of geometry or merge the subtools once inside of ZBrush. Run Dynamesh and a reasonable resolution. Check the mesh for holes and begin to smooth out areas of extraneous detail (for me, this would include regions such as the sewn threads by the pectorals). Use the ZRemesher Guide Brush to map out the general flow of the new topology. With ZRemesher, remesh to a reasonable resolution. Now, this new low-poly cage should generally fit the silhouette of your high resolution sculpt that you imported previously. Pretty cool, right? So now let’s try it for a collision body:

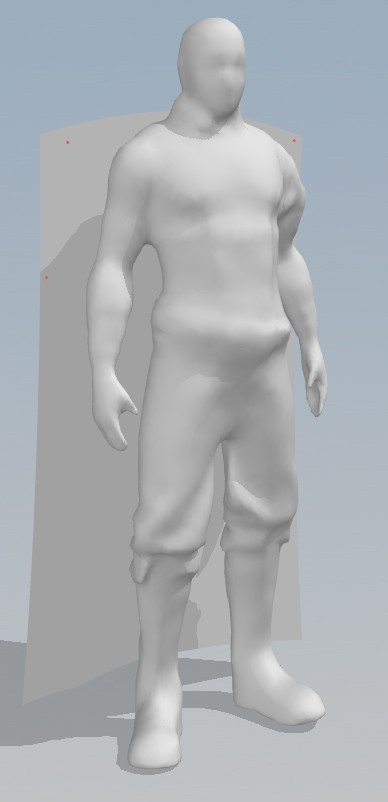
Using Dynamesh and ZRemesher to create a simplified collision body for cloth simulation.
The same idea applies, but this time I’m bringing in the entire low resolution mesh of the character since I’ll be wanting to collide with the entire body during various simulations. I could use this version of the character as a collision body, but if I can have a piece of constructive solid geometry that is essentially ‘water-tight’, I’ll have much less hassle while simulating the cloth. So in short, import the low-res version of the character, Dynamesh him together, ZRemesh to create a low-res quad mesh from that makes a bit more topological sense than the Dynamesh mesh, then run an even lower resolution ZRemesh on that mesh to simplify once more.
Now we can import that mesh into Marvelous Designer and revisit some of our old patterns that were setup previous for the cloak, hook, scarf, and sash.
Positioning the 2d cloth pattern in Marvelous Designer.
I re-position the 2D cloak pattern in 3D space and create some pins to hold it where necessary. I add a wind field during my simulation as I adjust parameters to achieve a more dynamic pose:
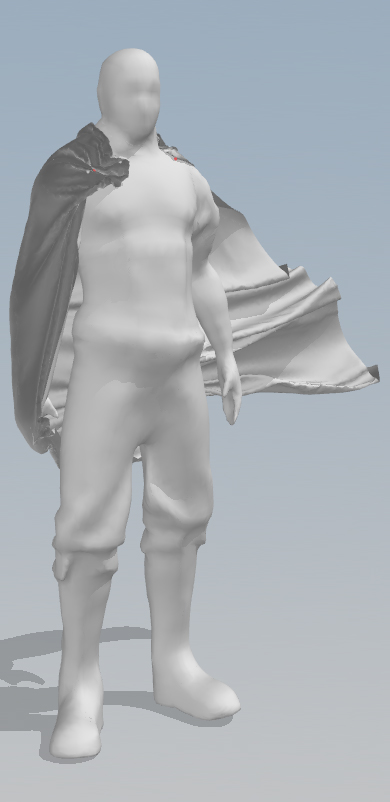
After adding a wind field in Marvelous and adjusting particle distance and cloth parameters.
I take the same approach for the rest of the cloth elements, making sure that my wind field is generally similar for each. In the end, I’m able to export some simulated meshes and add them to the low-res character as a sanity check. From here, I’ll take these triangulated, high res simulation meshes and create simplified quad meshes using some of the same techniques listed above.
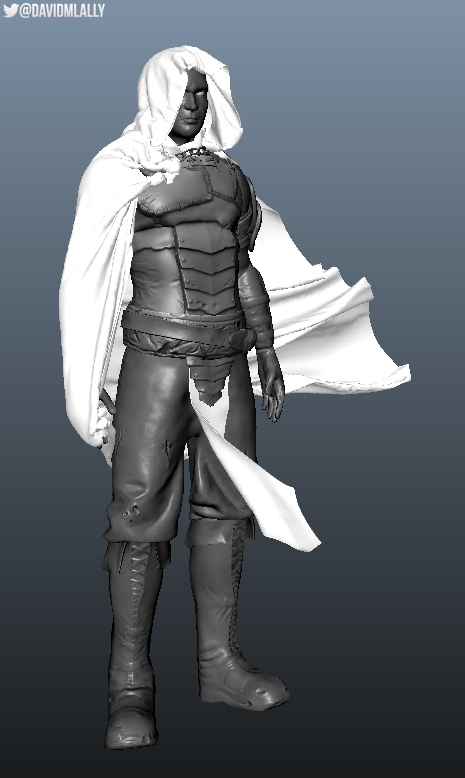
The white pieces indicate the simulated cloth.

Be careful with ZRemesher as it’s easy to go overboard. Having cloth this low resolution is appealing for a game asset, but it would be difficult to bake this many high resolution details in a mesh of this resolution. Not to mention we’ve lost quite a bit of volume in this example.
I’ll go ahead and call this the update as I’m still piecing together some of the cloth elements. Hopefully by my next post I’ll be able to block in some colors and describe that process as well.
Thanks for checking it out!
Twitter: @davidmlally